Table of Contents
If your MSI Afterburner Power Limit Slider is stuck, greyed out or just makes no difference at all when you change it? Well, this should solve your problems. Most Gaming GPU heads want to Overclock there GPUs to get extra speed (FPS) from them regardless of Power Consumption or Heat. But when GPU Mining, we want to help reduce heat, save power and keep our GPUs working reliable for a long time, i have some GPUs that have been running for 2+ years 24/7 with no reduction in performance
What Software do i need to UnderClock or OverClock my GPU?
There are so many great software tools on the market but for me, all my build get these installed as soon as i complete a fresh install of Windows.
How to Unlock MSI Afterburner Voltage Settings
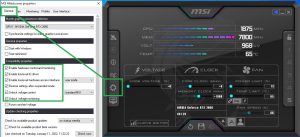
To unlock the Voltage Settings that we are going to need, follow these steps in MSI Afterburner
- Click on the cog symbol / Settings
- Tick all the option highlighted in Green
- Reboot MSI Afterburner
- “Volt” reading should now be displayed
What is the MSI Afterburner Power Limit for?
The “Power Limit” keeps control of the amount of Power (Watts) a card can consume. Let’s say a GPU has a stock power consumption of 100w Thermal Design Power (TDP). We set the Power Limit to 80% and so the GPU is now limited to use only 80% (or 80watts) of its designed requirement. With this in mind we can use the Power Limit to help reduce the power draw of our GPU to help reduce costs. This is very different to the “Core Voltage” setting but these are linked.
The process of reducing the “Core Voltage” of a GPU is called GPU UnderVolting and can be performed on most components in a quality PC, not just the GPU. Read up on How to Reduce Power on a Mining Rig
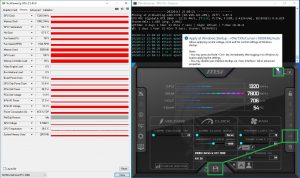
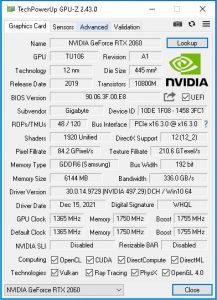
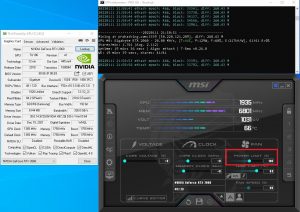
We see here with stock settings, MSI Afterburner Power Limit set to 100% our Gigabyte RTX 2060 draws 129 watts and has a hash rate of 28 MH/s at 217kH/W. This setup needs some tuning. The highlighted areas in green show what settings we need to focus on and the relationship between GPU-Z and MSI Afterburner has, this will help with the tuning
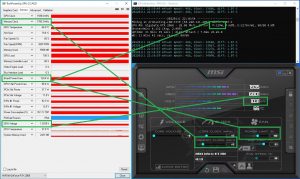
When we move the slide bar on the Power Limit, we should normally expect to see a drop in Power Consumption of the GPU. If your Power Limit Settings directly affect the Board Power Draw the read increase electricity efficiency while GPU Mining On some Nvidia RTX 2060 and RTX 3060 (maybe some other cards, drop a comment below if you know of any) the Power Limit bar does NOT change the Board Power Draw very much at all, as seen here.
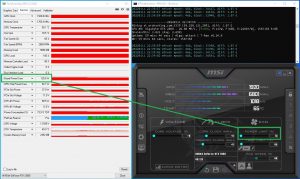
What is the Mining Performance and Hashrate of the RTX 2060?
NOTE: Overclock at your Own Risk. Pushing clock speeds to far can damage your GPU
Slowly increase the “Memory Clock” Speed +100 at a time. Monitor the Hash Rate and Board Power Draw. Any graphics glitches (graphic artifacts on screen) or crashes, STOP immediately and reduce the overclock by +100. Reboot your system and test again at the reduced speed. If all is stable for 24h then this is your safe overclock speed.
Ultimately you are trying to increase the overclock, but not create graphic artifacts or crashes, while not increasing the Board Power Draw, temperatures or fan speeds. This can take some trial and error and a lot of practice and patience. Here I stopped at 200Mhz Overclock as the Power Draw started to increase.
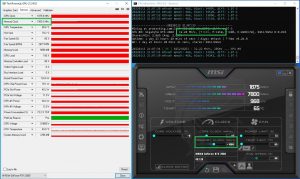
- Gigabyte RTX2060 Samsung Memory – Stock – 28 MH/s
- Gigabyte RTX2060 Samsung Memory – Overclock – 32.2 MH/s
How to Reduce Power Usage if You can’t Adjust Power Limit in MSI Afterburner
On the Gigabyte Geforce RTX 2060 REV 2.0 GPU the Power Limit Slider bar does nothing to reduce the power delivered to the card and so we have to look at another way to reduce the power. This is now when we use the “Curve Editor” in MSI AfterBurner
Here we will focus on the following
- Board Power Draw – How much Watts the GPU is using, we need to reduce this. Currently around 125watt
- Hashing Speed of the GPU – 32.54 MH/s current mining speed
- Core Clock – Set to 0
- Curve Editor – This will adjust the core voltage that will affect the Board Power Draw
- GPU Voltage – 0.9680v or 968mV – This should also reduce
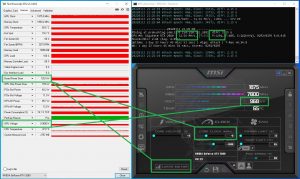
How do I use MSI Afterburner’s Curve Editor to Undervolt GPU?
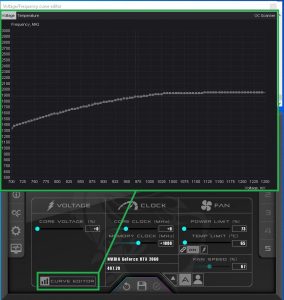
Step 1 – Click “Curve Editor” or press CTRL + F – a Graph screen should open
This graph is showing the X-axis as the Voltage and the Y-axis is the Core Clock frequency. What we need to do is reduce the number of Volts the cards get at a given Clock Frequency, thus reducing our Board Power Draw. At the same time not reducing our Hash rate of 32MH/s by as little as possible
Step 2 – Hold down SHIFT and “click and hold” the far most left part of the graph. While holding the mouse button down, drag right to the end to highlight all of the graph
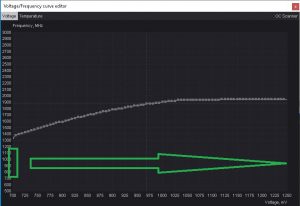
This step can be a little tricky and always takes me a few attempts but when completed correctly the graph should turn a slightly lighter shade of grey to show its been highlighted.
Step 3 – Click on one of the small light grey squares on the Volt/Frequency curve and a new box should appear that you can type a value into, now press SHIFT+ENTER
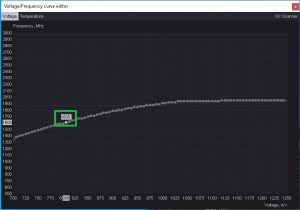
If completed correctly, you will be able to edit the GPU Frequency in the small box. This will manually fix the GPU Core to run at a set speed no matter the load on the card.
Step 4 – Try starting with 900MHz and work up in 50s until you find the lowest setting the card will run at.
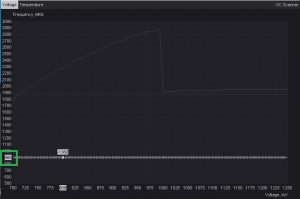
I have set the frequency to 900MHz, the curved graph is now flat meaning it will try and run at this speed no matter the load on the card. Close the Graph and click on the “Apply” Tick button to try the settings on the GPU.
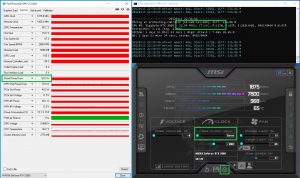
If, when applying the setting nothing changes then either an error was made or the card doesn’t support that low a voltage. Back to step 1 but increase by 50MHz
Step 5 – Try the steps again but increase the value by 50 each time until a setting holds. This card held its setting that i typed, 1050MHz but auto adjusted up to 1320Mhz. This will be the min setting the card will run at
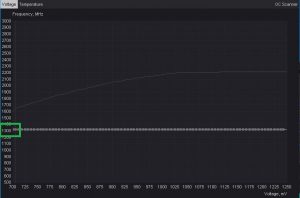
Step 6 – Sit back and review your settings, let the GPU run for a while to confirm it doesn’t crash on the Undervolt.
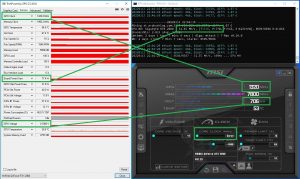
After we have confirmed the GPU doesn’t crash or the hashing rate doesn’t reduce (if it does, increase MHz by another 50 and repeat the process until the card is stable) we can see that:
- GPU Clock – Has reduced due to limit we placed on it via the “Curve Editor”
- Board Power Draw – Has dropped to 77.4 watts
- GPU Voltage – Reduced to 706mV
- Core Clock – Has changed to “Curve” to show you are using the curve editor settings
Step 7 – Save your setting and “Apply at Start-up” ready for your next reboot. Click the Windows Icon to apply on boot, then the disk icon and then a slot number to save the setup too.
