Table of Contents
Some great steps to increase electricity efficiency while GPU Mining and reduce GPU Mining costs. This guide will help you understand the steps to reduce power while mining and so can be applied to all makes and models of GPU
Regardless of your GPU choice, Or GPU model we all want to help reduce the costs, heat, power consumption, increase efficiency and the Hash Rate of our Mining Rigs.
One of the first things I would recommend any serious miner to buy is a Watt Meter. This will give you the actual power draw at the wall of a given item that is plugged into it. In early stages of mining, you don’t need anything fancy, just something that is good enough to see a 10w power swing either up or down.
If you don’t have a wall watt meter yet then using the watt readings from CPU-Z is good enough and is a great place to start.
How to reduce power consumption while GPU Mining
The best place to start is actually by looking at your CPU power consumption and reducing this first, this will then give you a base line before you increase the efficiency of your GPUs. Have a read of “How to save costs while CPU Mining” There are some areas that cross over when reducing the power usage of a CPU and/or a GPU mining and so you should cover both areas but I would recommend starting with increasing CPU efficiency first.
NOTE: Changing options from the manufacturers stock settings comes with some risks and so you complete this when your happy with those risks.
Take care when changing settings and do not change too much at one time. Lots of small changes takes longer but will gain better and safer results
- Buy only Gold or Platinum Spec PSUs – Covered on Best PSU to Buy for Mining
- Reduce the GPU voltage (Power Limit)
- Reduce the core GPU speed (manual adjustment of Power Limit)
- Reduce the speed of the memory
- Review your rig design
What is the test rig?
The test rig has currently had the CPU power consumption tweaks applied to it and so is running at peak CPU efficiency.
- CPU = Intel Ivy Bridge 3770K – 3.5Ghz (vCore set to 1.0v)
- Mobo = ASUS P8Z68-V PRO GEN3
- Memory = 8GB (2x 4GB Sticks) Corsair DDR3 2000Mhz Memory CMX8GX3M2A2000C9 (set to 1.375v)
- Storage = SSD Drive
- Using the CPU, HD4000 as video output. This allows the GPU to be 100% dedicated to mining
This rig runs at 57Watts Idle with NO GPU plugged in. Once I have a Zotac GTX 1660 Super plugged into the rig, it increases to 68 watts at idle. So, the GPU costs us 10 watts at Idle when not mining. I have 2 of these cards so i see around extra 20watts at the wall
Software Required, always check you arrive on the correct HTTPS Secure site when using links
How do I optimize my Nvidia GPU Graphics Card for Mining?
The first thing we need to do is ascertain a base line for the mining card we are going to tune. We do this by simply starting to mine, launch GPU-Z and MSI Afterbuner. You can use any mining software you like and what ever pool you like; these do not affect power consumption. have the 3 windows arranged to you can see them like this
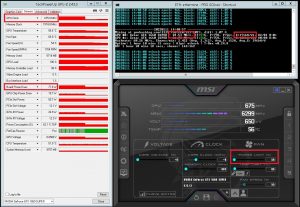
The screen show below shows mining for a few minutes and we see in GPU-Z the “Board Power Draw” on idle jump from 8w to 110watts (Red Highlighted Box). The cards are Mining at 20.88Mh/s for 109watts. 203kH/W is not great efficiency, and I would like to target a Nvidia 1660 Super at anything over 30Mh/s speed with 400kH/W (Green Highlighted Box).
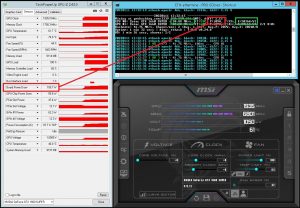
The first thing we need to do is find the max hashing speed we can get from our GPU. We achieve this be either increasing or decreasing (yes, decreasing) the Memory Clock. We can see here the relationship between GPU-Z and MSI Afterburner. GPU Clock in Red, Memory Clock in Green
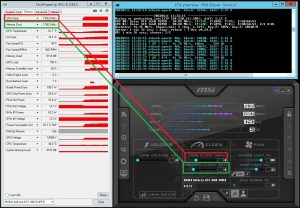
At this point refer to What are Good Nvidia GPU Memory Settings for Mining in the below table as a quick guide to help you get started
If you have a Hynix Memory GPU, start by reducing your “Memory Clock” down to (minus) -502. Just by changing this one setting we can see the “Memory Clock” speed change right away in GPU-Z and then after a few minutes the Hashing Speed increases in T-Rex Miner. At this point the “Board Power Draw” drops just a little due to the reduction in memory speed. We now have a great Mining Speed of 31.74MH/s but the efficiency is still low at 256kH/W
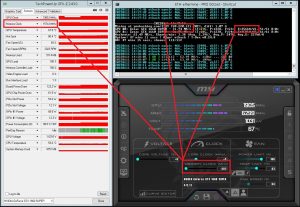
If you have Samsung or Micron Memory GPU I would then look to overclock the memory to increase the Hashing Speed. We do this by increasing the “Memory Clock” a little at a time (+50 each attempt) until it becomes unstable, crashed or locks up. Then take 100 from that crash value and test at that speed for a while. If 24h passes with no issues that’s your overclock speed, if not reduce it a further 50 and test again
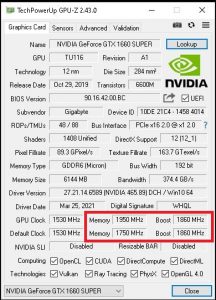
Here we can see the GigiByte 1660 Super with Micron Memory. The Boost clock speed was 1860MHz to I started from that point and increases 10MHz at a time. I stopped at 1950Mhz as the return in Hash rate to Power Consumption started to diminish.
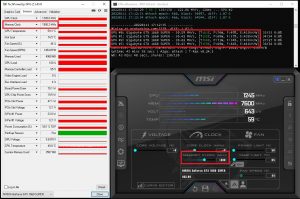
I would not recommend going too far over the Boost Clock Speed of the GPU. Check the first page of GPU-Z and look at the memory speed and then the Boost speed (shown in red box). The Boost speed is what the manufacture has rated the card to automatically overclock (Boost) too. We can then assume this is a fairly safe overclock. On my Gigabyte card I have taken the card 90Mhz over what Gigabyte has rated the card too. Not a huge overclock but for 24/7 Mining at this Power Draw is great.
How to lower the Power Limit of my Nvidia GPU for Crypto Mining
Now the GPU is running at its max hashing speed, we can to reduce the power consumption of the GPU for maximum efficiency to reduce our electricity costs. We do this by limiting the amount of power supplied to the card. In MSI Afterburner we can adjust this setting via the “Power Limit” slide bar, at default this is normally 100%. Let’s reduce this to the minimum and see what results we get, the Zotac 1660 Super, slides down to 56%
NOTE: Read here If your MSI Afterburner “Power Limit” Slider does not work
By reducing the power limit, we effected the GPU Clock speed, Board Power Draw, Hash Speed and Efficiency. The Power Draw is looking much better at 77.6watts but we lost some Hashing Power as well. Now increase the “Power Limit” 1% at a time until the Hashing Power returns to around 31.74MH/s we had earlier but keeping the Power Draw low as possible, it will creep up a little. Between each change you make, wait for at least 3 mining summaries (the white txt that displays your cards with the hash rate etc) in T-Rex to scroll past.
On my card, shown here, the Hashing Rate of 31.74MH/s returned at 65% Power Limited.
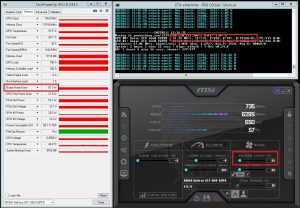
Due to the silicon lottery all cards are different and so each one needs fine tuning for best results. Some cards are wildly different even from the same batch of cards with the same BIOS and Memory. On this Dual GPU rig I have 2x Zotac 8GB 1660 Supers, both require different power requirements to get around the 31+ MH/s hash rate. One card is super-efficient, the other not so.

What are Good Nvidia GPU Memory Settings for Mining
As a quick short cut, generaly its been found that certain memory run best a particular speeds. Here is a quick summery to help you get started, this is not always true and so you will need to test your card. Check GPU-Z to find out your memory manufacturer.
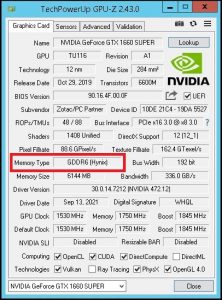
- Hynix Memory – Underclock to (minus) -502 – There is no point trying to Overclock this memory.
- Samsung Memory – Overclock to plus +600
- Micron Memory – Overclock to plus +600
You should now have a good idea on the fundamentals of Underclocking and Overclocking a GPU’s Memory. Remember all GPUs are different and so each card needs to be tuned individually.